 Hardwood floor refinishing can be called magic, because this work gives new life to hardwood. So how can you help an old floor look like new? What are the steps and tools you need to do this?
In today’s market there are many good tools for hardwood floor refinishing, which make the sander’s job a bit less dusty, and yet, the dust will be generated. To avoid contamination of the furniture and other things around the house where you work, use plastic.
With the plastic, seal the doorways where there are no doors. Also close vents with plastic. To prevent damage to walls and doorways, secure the plastic with painters’ tape. To remove excess dust, install a fan in one of the windows.
Even if you do take precautions to ventilate well, you run the risk of wood dust getting into your airways. To avoid this, use a respirator, and if this is not possible, at least use a mask
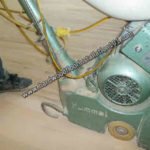
Remove all moldings (if any) together with nails, then remove all baseboards, and only then can you use one of the most basic tools in hardwood floor refinishing – a drum sander. Remember that not one nail should interfere with its work.
First, practice working with a disabled drum sander. Move it back and forth several times. Feel how the tool moves and how fast you can move it. The fact is, a drum sander is quite heavy, bulky and awkward. As soon as it touches the hardwood when it’s turned on, it immediately begins to cut the upper layer of the wood. Therefore, it is very dangerous to leave the drum sander turned on in the same place, as it may harm the hardwood, cutting too much wood fiber.
Depending on the depth of scratches, use grit paper sizes. Always start working on the right wall (if you’re right handed), and move forward from about two thirds of the entire room. Slowly move the drum sander, until you hit a wall. Pick it up and move on 2-4 inch to the left, and then move in the opposite direction. Repeat.
When you start working on the rest of the hardwood, try to make a smooth transition from where you have already worked with the drum sander. Repeat the sanding process 3 or 4 times, using 120 grit paper. For the final process, use 150-180 grit paper.
Change the sand paper during hardwood floor refinishing
Throughout the process of hardwood floor refinishing which does not fit to any type of floors, change the sand paper as often as possible and empty the accumulated dust from the dusting bag. Every time your drum sander is turned off, use the opportunity to check its dusting bag. Clean the dusting bag when it is 2 / 3 of full.
To check the quality of sand paper, as often as possible, turn off the drum sander, so as not to do unnecessary work. It is also important to know how to install the sand paper. This you can learn in the department for rental tools. They can also teach you how to re-install the bag, after cleaning it from dust.
Experienced sanders do not recommend beginners do this work with an engineered hardwood floor. You can make do hardwood floor refinishing at home, if you have a solid wood.
You Might Also Like:
Hardwood Floor Refinishing – What Color Do You Chose?